

Add your first customer
Where customers live
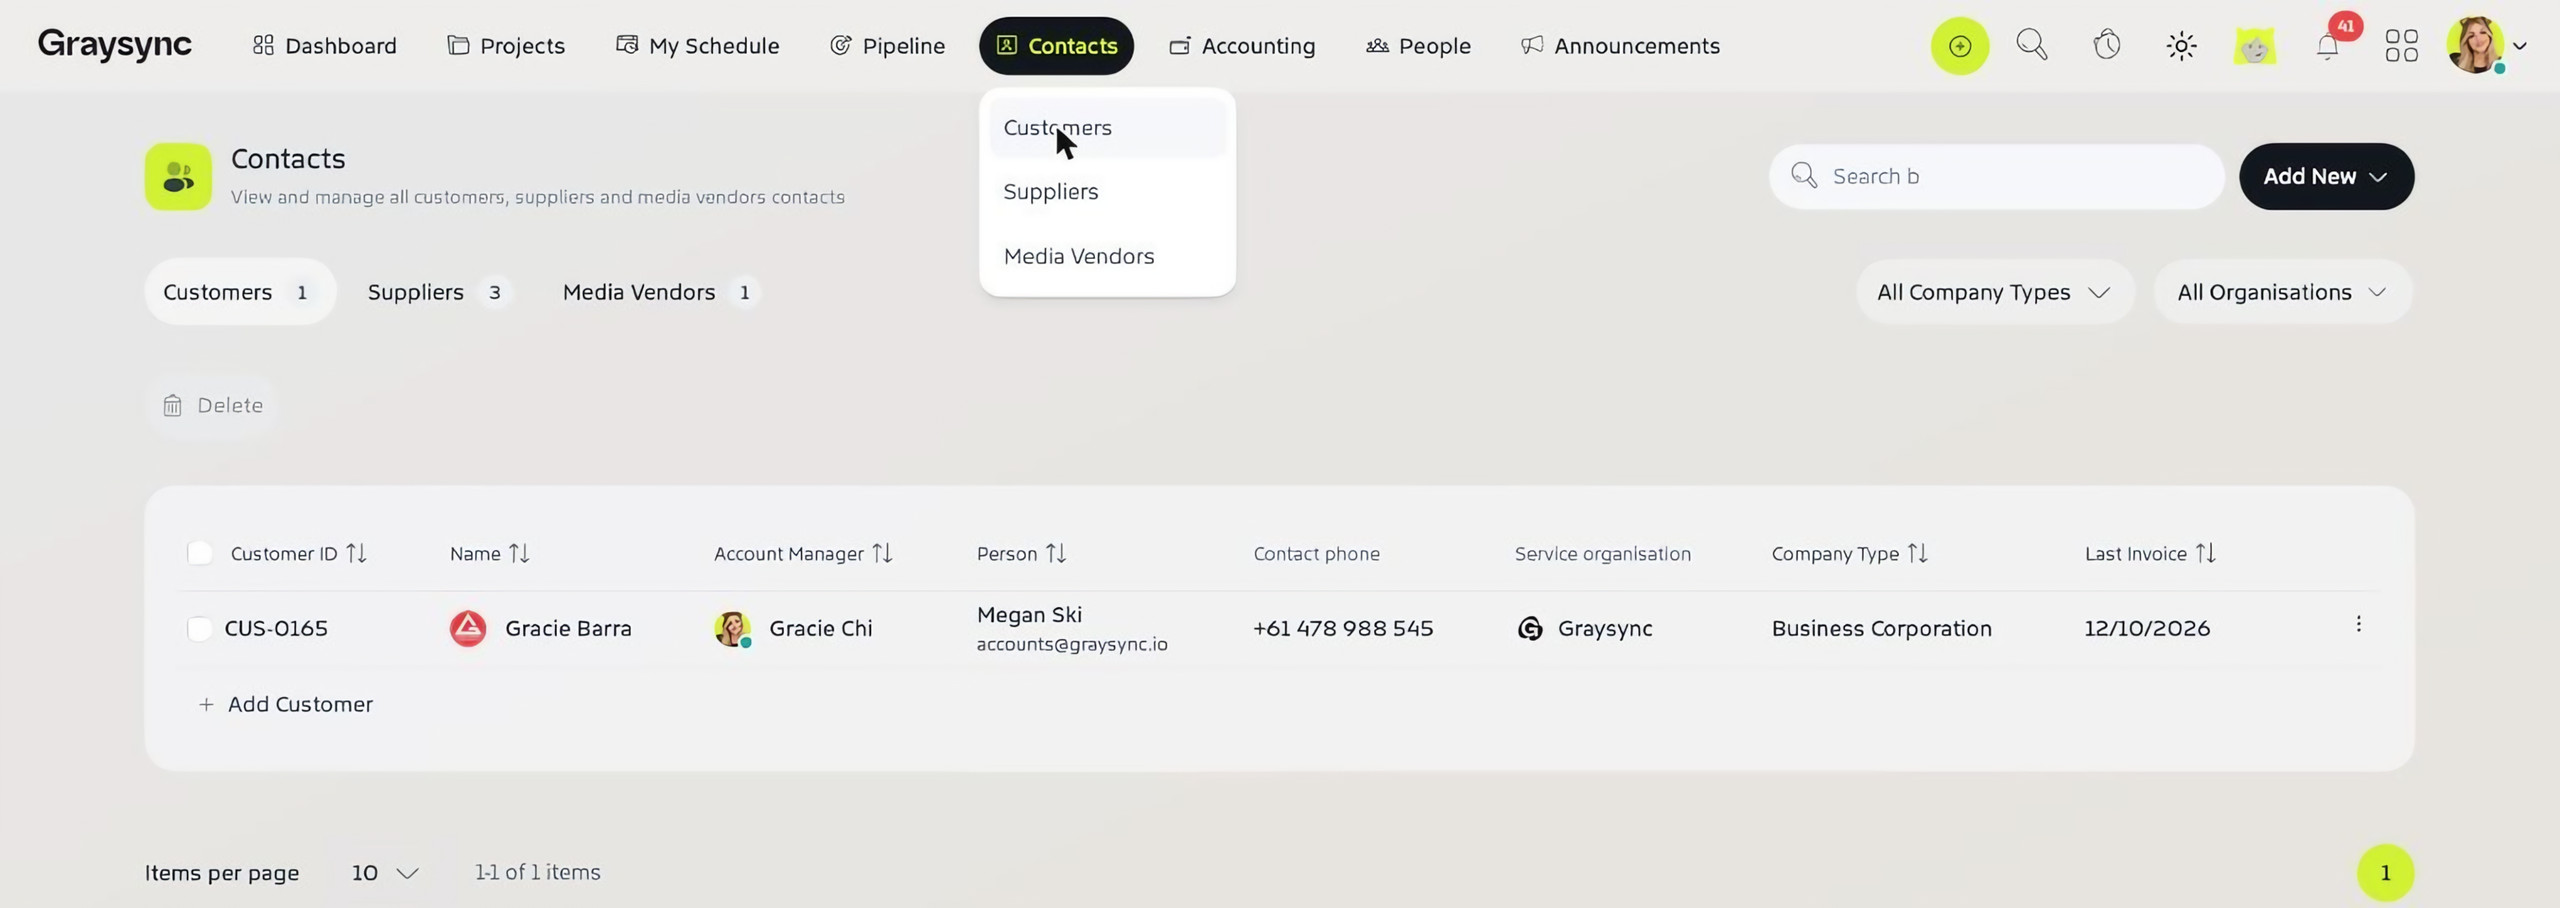
Customers sit under Contacts, alongside Suppliers and Media Vendors. Scopes, client projects and invoices are all linked to a customer, so it’s worth adding them first.
Step 1: Add the company details
- Go to Contacts → Customers and click Add Customer (or use Add New, or Quick Add → Add Customer).
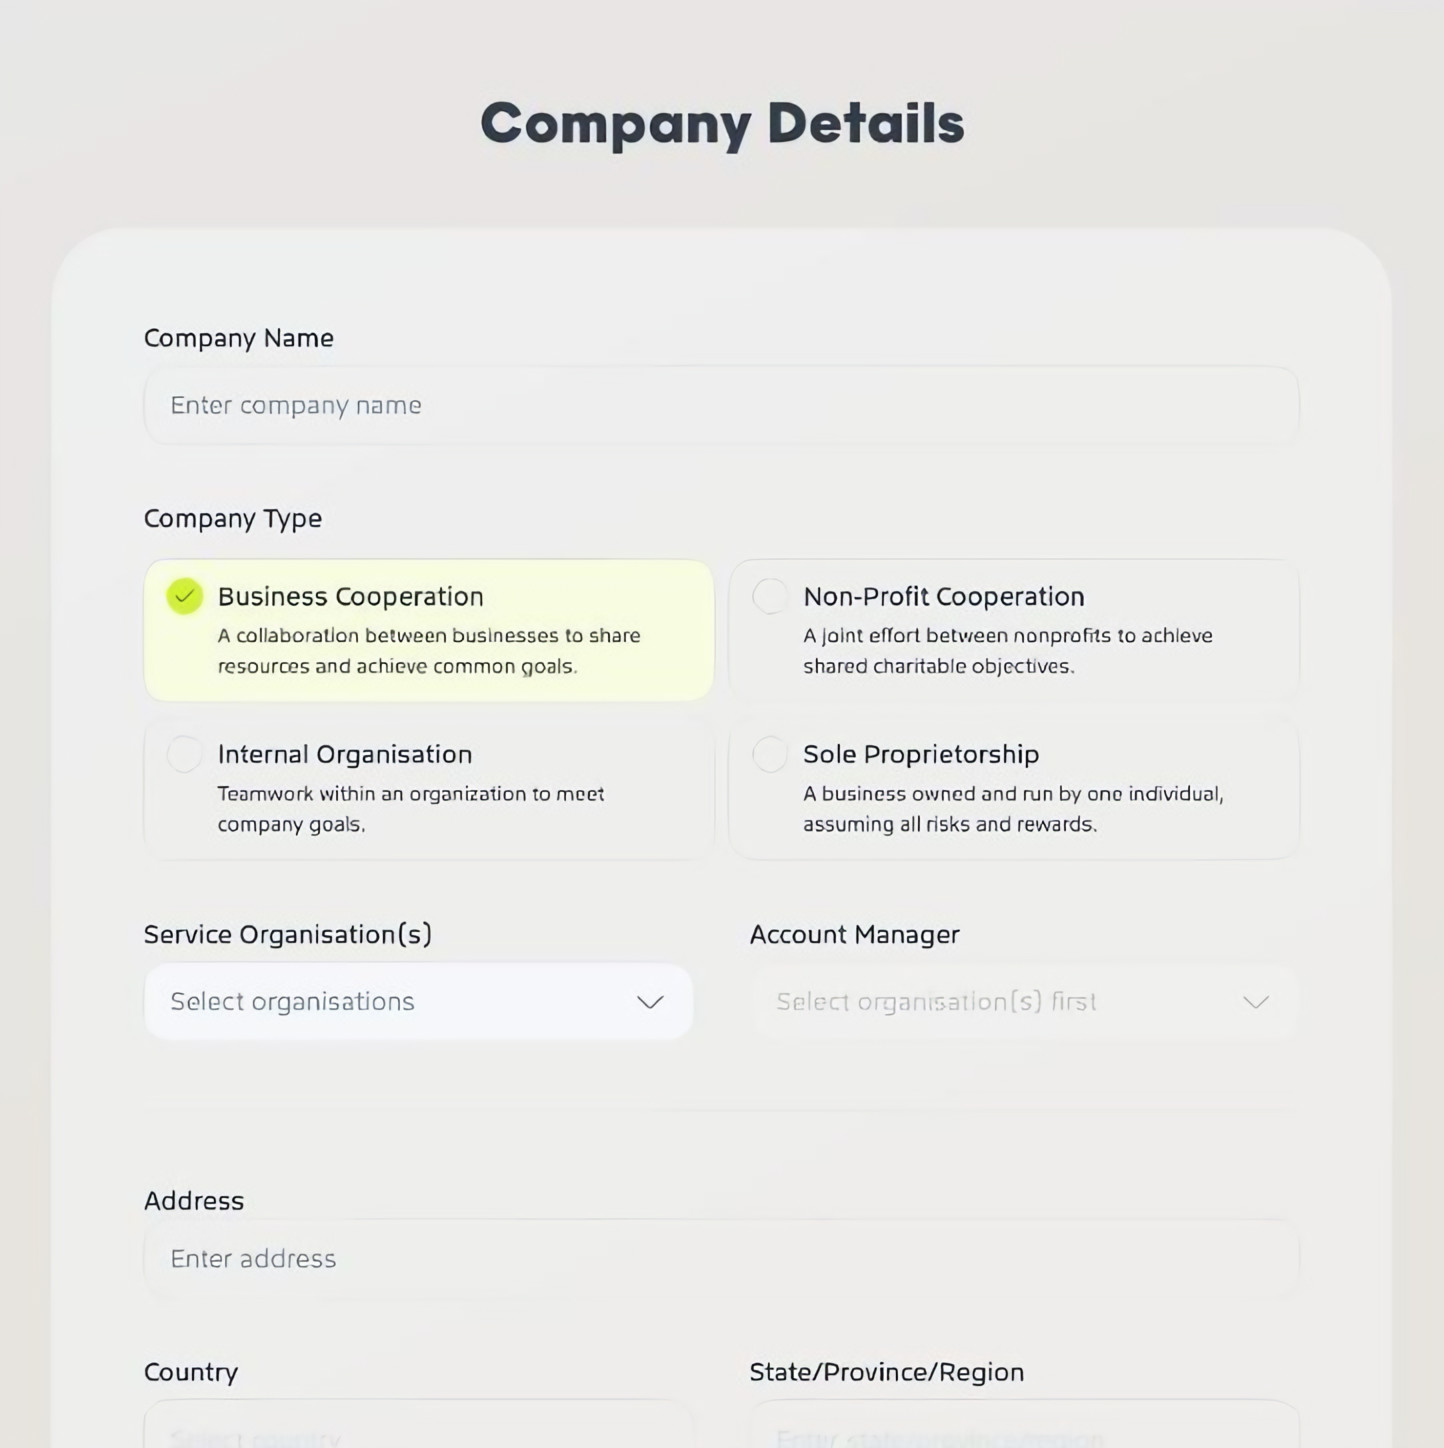
- Enter the Company Name and choose a Company Type: Business Cooperation, Non-Profit Cooperation, Internal Organisation or Sole Proprietorship.
- Choose the Service Organisation(s) that will work with this customer, then their Account Manager.
- Add their Address, Country, State/Province/Region, City and ZIP / Postal Code.
Step 2: Add their financial details
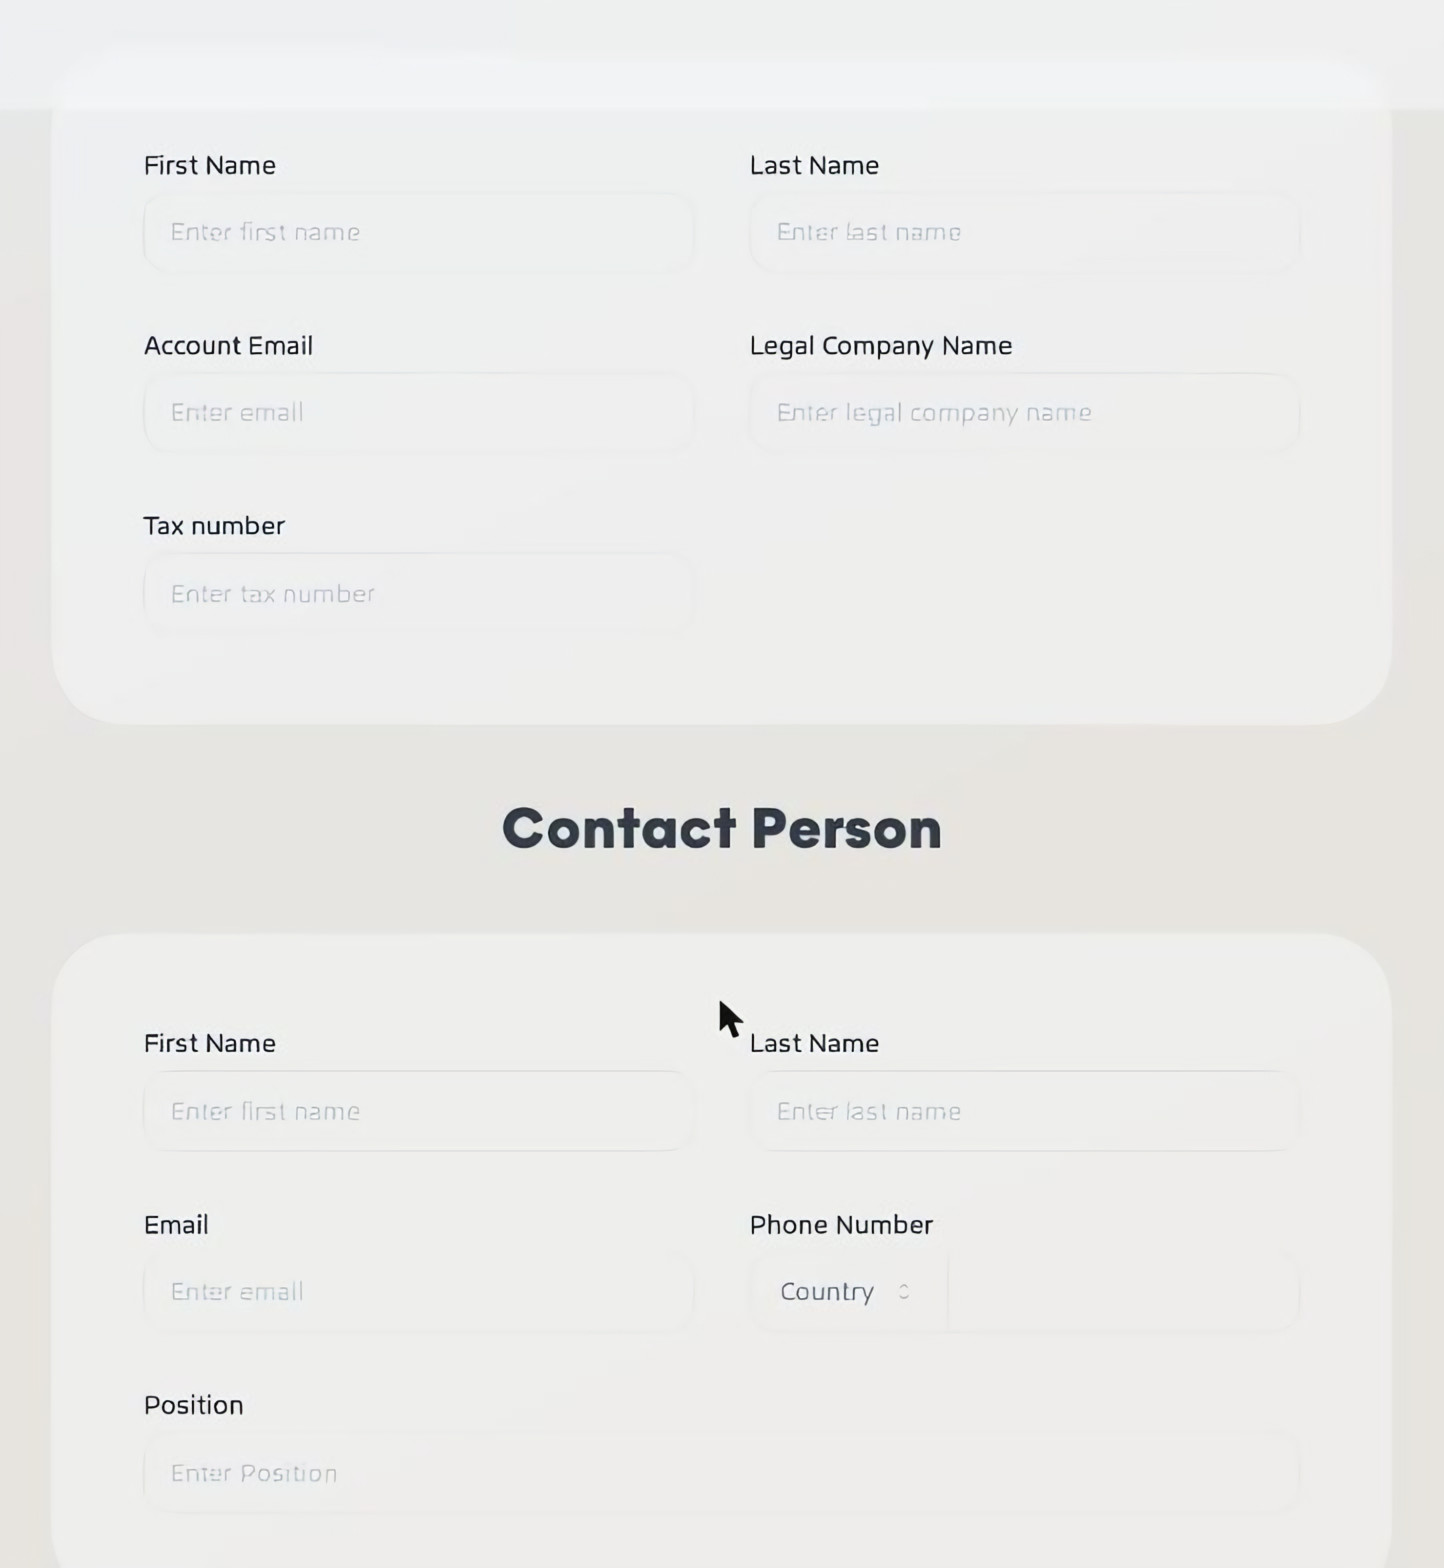
Under Financial Details, enter the billing contact’s First Name, Last Name and Account Email, plus the Legal Company Name and Tax number. The legal company name is who your invoices are billed to.
Step 3: Add a contact person
Add your main contact’s First Name, Last Name, Email, Phone Number and Position, then click Create Customer.
After you've added the customer
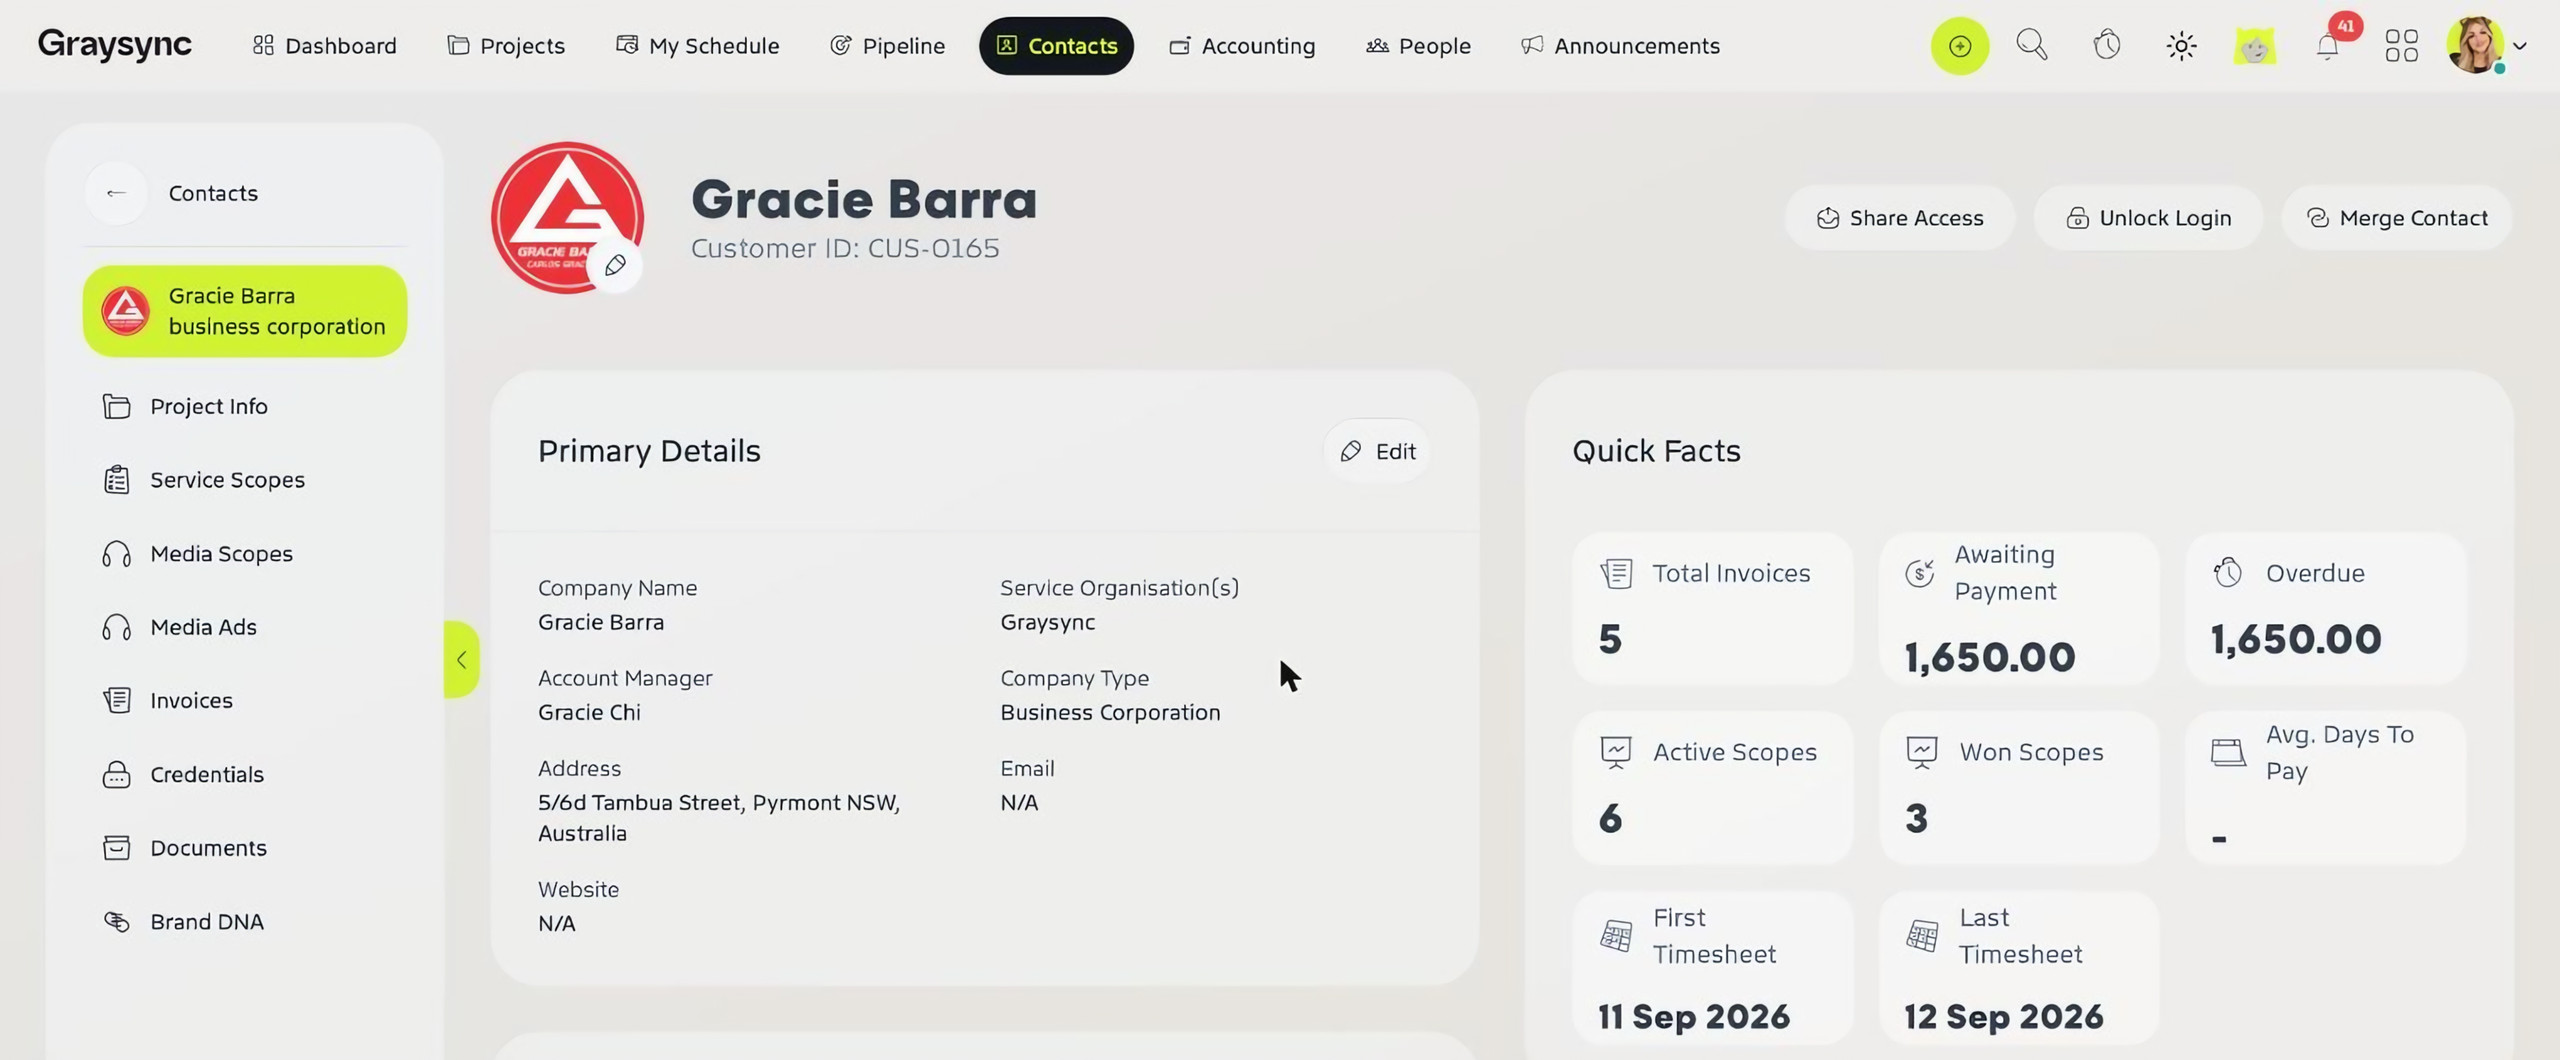
Open the customer to see their Quick Facts (total invoices, awaiting payment, overdue, active and won scopes, average days to pay and timesheet dates) and their Primary Details. Use Add New to add more financial details or contact people at any time.
The left-hand menu takes you to everything linked to the customer: Project Info, Service Scopes, Media Scopes, Media Ads, Invoices, Credentials, Documents and Brand DNA.
What's next
Now you’re ready to scope a project with a quote.