

Create a project
Before you start
Projects are where your team plans and delivers the work. Make sure the customer is already in Graysync (see Add your first customer). Many agencies create the project once a scope has been agreed, but you can create one at any time.
Step 1: Start a new project
- Go to Projects and click Create Project, or use Quick Add → Add Project.
Step 2: Choose the project type and billing
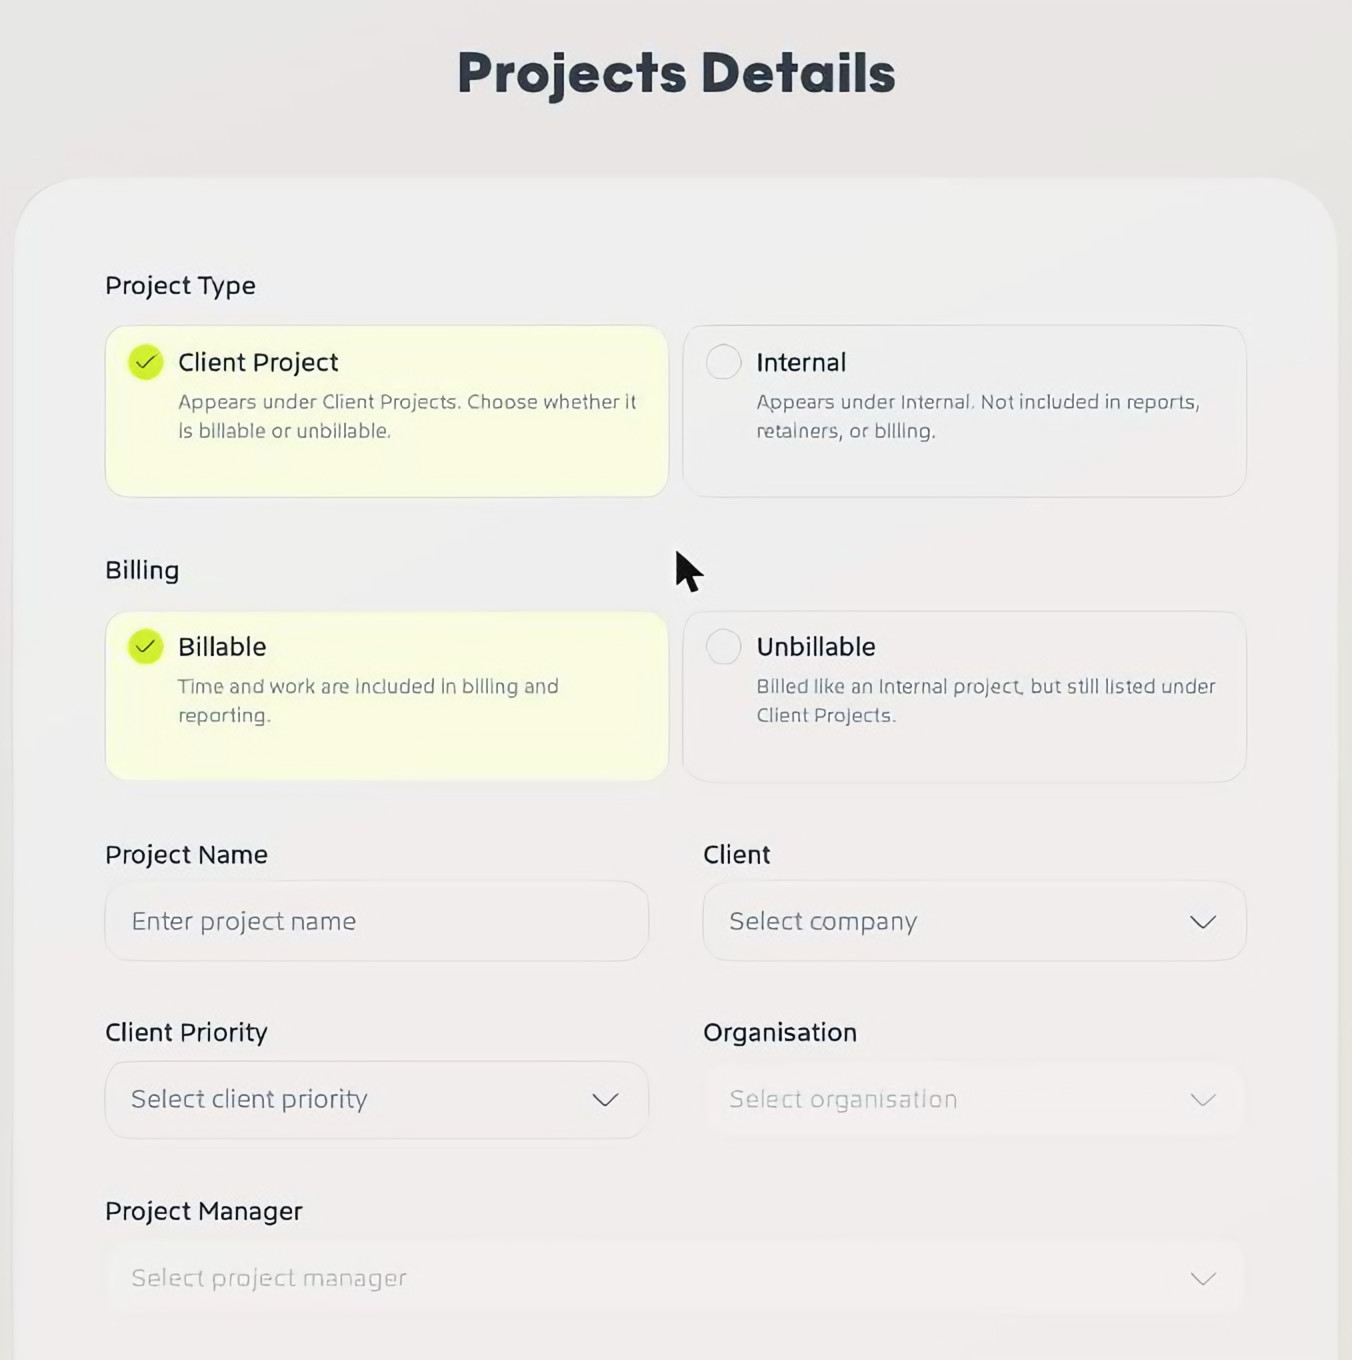
- Client Project – appears under Client Projects. Choose whether it’s billable or unbillable.
- Internal – appears under Internal Projects. Not included in reports, retainers or billing.
- Billable – time and work are included in billing and reporting.
- Unbillable – billed like an internal project, but still listed under Client Projects.
Step 3: Add the project details
Enter the Project Name, then choose the Client, Client Priority, Organisation and Project Manager.
Step 4: Choose templates and access
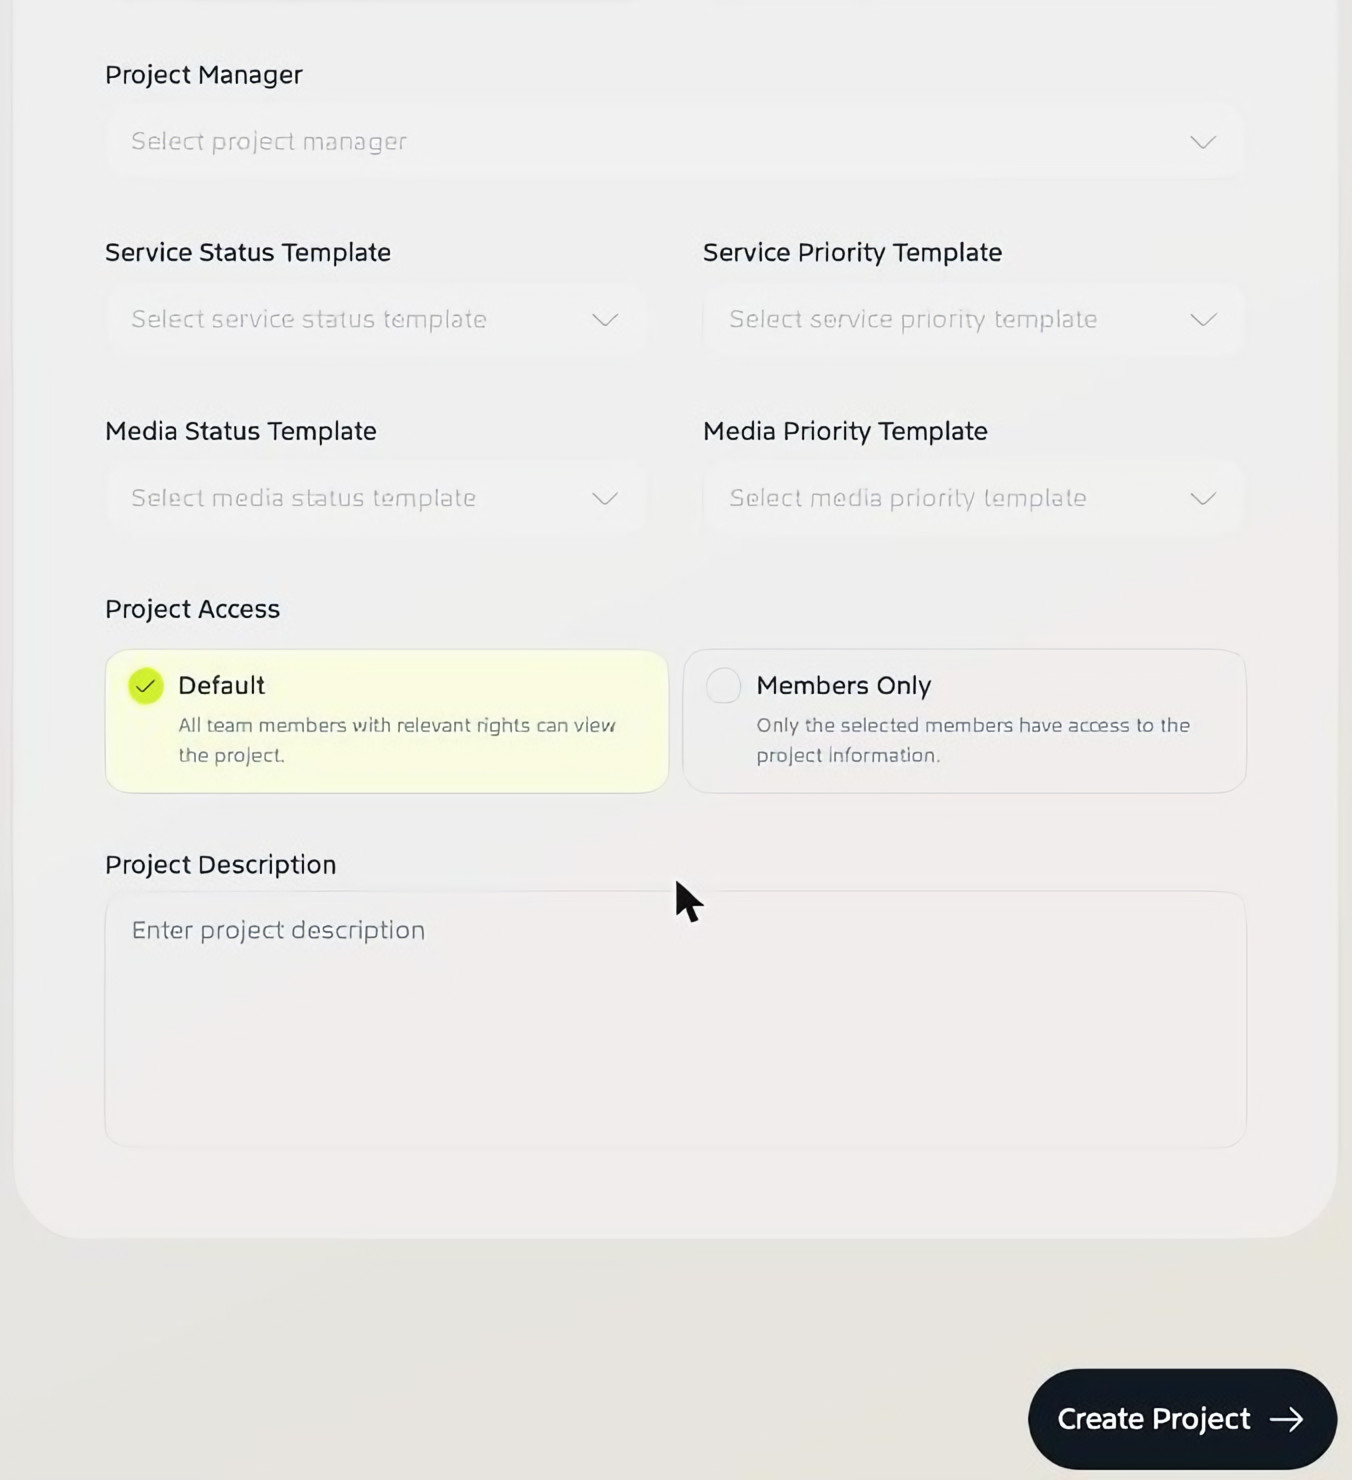
- Service Status Template and Service Priority Template – the statuses and priorities used for this project’s service tasks.
- Media Status Template and Media Priority Template – the same for media work.
- Project Access – Default lets all team members with the right permissions view the project. Members Only limits it to the members you select.
Add a Project Description and click Create Project.
After you create the project
Your project appears in the Projects list under Client Projects or Internal Projects. Open it to add work with + Add New Scope, plan tasks and bring in your team. You can change these settings later from Project Info in the project’s menu.
Next, take a tour of the project workspace.